RESTORING THE V12 ENGINE OF A CLASSIC 1972 FERRARI 365 GTC 4


|
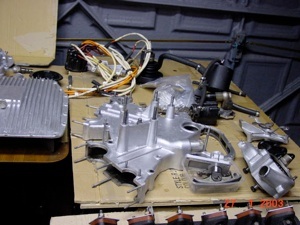
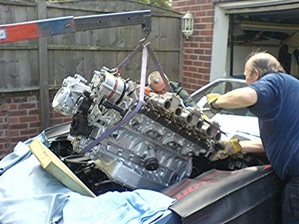
I drove the car the 200 miles home & parked it overnight in my garage. I could not wait to get at it & the next morning& I was messing bright & early.I moved the car & there was a pool of oily water under the front end The leak was a mixture of oil & water coming the front of the engine & the likely source was the oil/water pump assembly.The water/oil mixture leaked freely from where I suspected & the cause was a defective main seal. First step is to drain all the fluids,engine oil,gearbox oil & fuel & then remove the bonnet. I then began making the engine smaller & lighter by removing the carburettor air cleaner boxes & disconnecting everything in sight. It was a really long task & some things were easily done & others not so easy but eventually all was disconnected. Inside the car it was necessary to remove the gearstick & this entailed taking the centre console apart. I eventually got down to where the gear stick was attached & removed the stick as a complete assembly. Taking the engine out in one piece meant that the gearbox had to pass through a really tight space between a chassis member below & the engine firewall above |
  .jpg) |
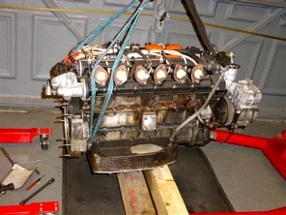
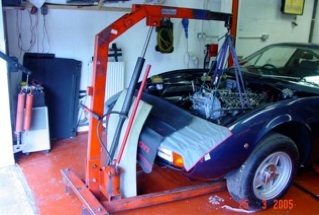
I was not pleased with myself as I had spent quite a number of hours pre-purchase checking everything out including a full engine compression test.The oil/water leak was not apparent when I checked underneath but the 200 mile trip home revealed it. Removing the engine was not something I had planned to do & there were two ways to do this.The first was to remove the engine alone after splitting from the gearbox.The alternative was to remove the engine & gearbox in one unit & I opted for the latter. I was told it was the easier option & it was then easier to replace any worn clutch parts & check out the gearbox. Removing the engine & gearbox together is best achieved by jacking the rear end up & placing the chassis on 24” high axle stands.The engine slings are positioned to angle the front end upwards after disconnecting the gearbox.These angles enable the removal without as much interference from the chassis cross member or the firewall.It still takes some manipulating. You need short slings & a high roof to your garage or workshop.As you can see when replacing the engine I had the front end outside to be sure of the height requirement. |
 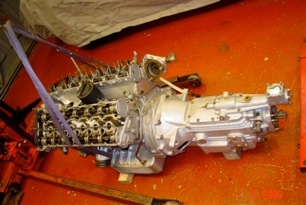 After separating the engine from the gearbox I degreased a small area on the top of the engine sump. I was really surprised that so much oil & road dirt had accumulated there but there was an obvious leak Bill Badurski, Ferrari Club of America Technical Chairman said that the only way to rebuild the motor was properly was with it out of the car. He is correct & the many failed attempts by many different capable people show this to be true. My original plan was to replace the water pump seal & replace anything that was likely to be worn.The original water/oil pump seal led to me fitting an uprated tensioner for these pumps but one thing led to another.The original tensioner stud is 6mm diameter & the improved version requires an 8mm stud.I made a stud the correct size with a smaller thread which worked really well. |
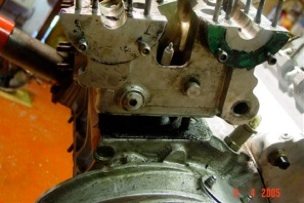
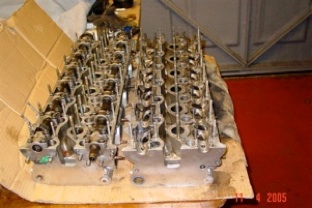
  It took about a week of intermittent persuasion to release both heads. I should have made some sort of puller but hindsight is a wonderful thing.The corrosion product of aluminium heads steel head studs fine white aluminium oxide)which forms a really efficient bond.Repeated application of penetrating fluid does eventually break it up but getting the heads up vertically is a difficult job. 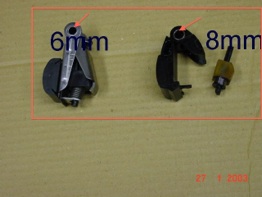 |
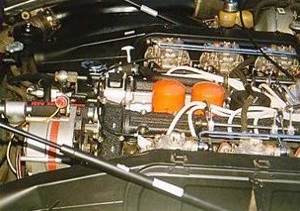
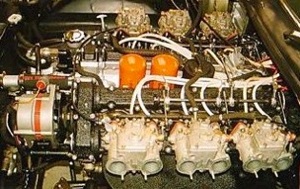
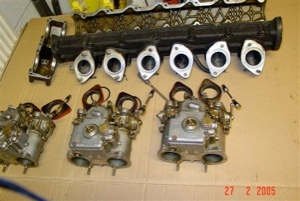
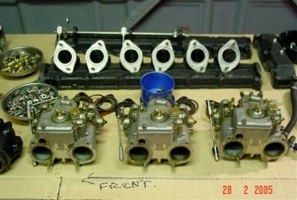
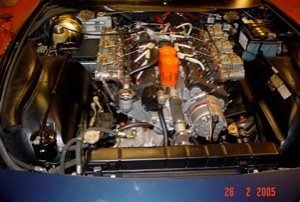
  The cam covers which incorporate the carburettor inlet manifolds were stripped & repainted with PJ1 Fat Black Wrinkle finish paint.The exhaust manifolds were gently bead blasted & painted with VHT exhaust black & look really good & the stainless exhaust was painted with the same paint My original plan had long since been abandoned because so much that I expected to be sound was not.Routine servicing was limited to oil changes & not much else & the only driving was to & from an MOT station. Everything else that I did on the car came under the umbrella of "The Midas Swell" |
 |
 |
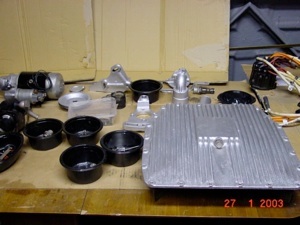
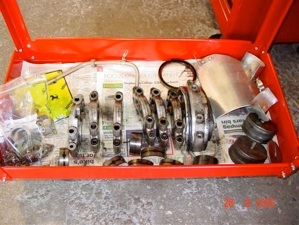
Most of the engine paint had degraded to a from a silver to a dirty grey so these parts were thoroughly degreased & painted with simple engine silver paint.Initially this was far too bright but after a few weeks & now months has become an almost perfect colour. Attention to the detail of all these parts makes a huge difference to the appearance of the finished motor & is worth the effort. |
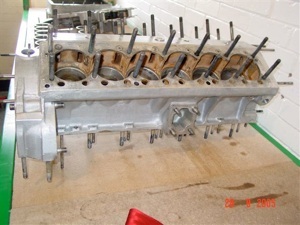
   Removing the cylinder heads is one of the most difficult & time consuming jobs on these old V-12 engines & requires more than a little patience & persistence & is done a little at a time.I have since found a design for a metal plate to lift the head at www.365gtc4.comwhich is an excellent site for all things GTC 4. I would definitely have made such a plate if I had my time over & would recommend to anyone needing to lift the heads. |
  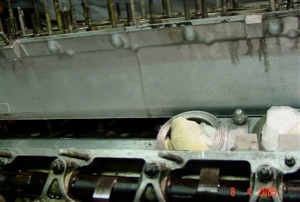 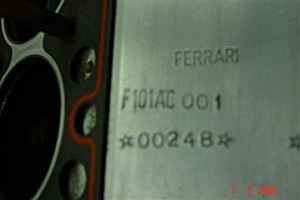 |
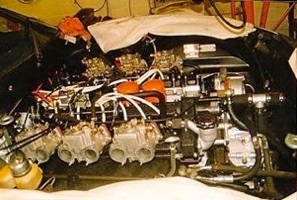
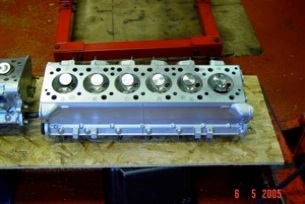
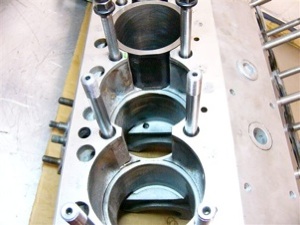
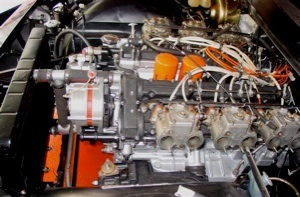
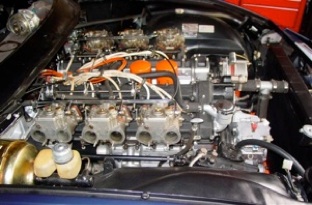
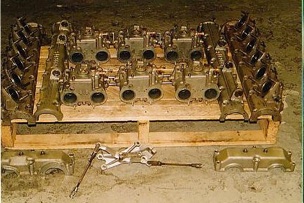   The Ferrari engine number & engine type is located on the flat piece between the banks of cylinders. It is j behind the twin oil filters & is not be seen easily.The construction & thickness. of the head gasket can clearly be seen. It consists of a metal core & a neoprene coating together with red silicone beads to prevent water & oil contaminating. If your replacement gaskets aren’t like this do not use them! |
|
The decision to take out the engine & do the top end repairs rather than doing this work with the engine still in the car is a wise choice. I have now heard of several similar attempts which have produced the same result. An expert mechanic who did the head job with the engine in the car is now doing it again with the engine out. |
 |
 |
|
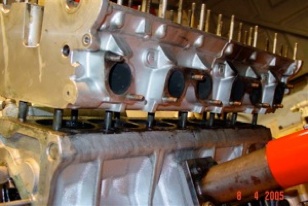
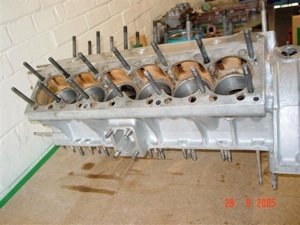
The heads were sent to Headshop(UK) for report & overhaul.The heads were tested,skimmed & all valves,guides & seals were were replaced together with their guides & seals in a 14 day turnaround. The heads are now back on the block & I have reset the valve timing,clearances & ignition timing & rebuilt the engine. |
 |
 |
  In July 2005 a fully charged battery was connected & the engine fired first time & ran perfectly-for about 2-3 minutes.I noticed some fumes/steam from the exhaust but I was unable to immediately check the coolant level.A check of the oil level showed water contaminating the oil on the dipstick. Water in the heads was finding its way into the oil drain tubes & was collecting in the sump.This is the worst engine nightmare & I was to go back to square one. Much time & money had been spent but my rebuild was unsuccessful yet there were positives. |
  Neil Leffley suggested I got advice from an expert & recommended ex-Graypaul engineer Peter Higgins. Neil, was a former Cosworth engineer himself so I was happy to take his advice.Peter has a workshop at Loughborough & undertakes all work personally. I had messed up & was not sure where so if I messed up again a good deal of time & money would be wasted.Two Ferrari supplied head gaskets is almost £300 & was just one reason for getting an expert’s help. |
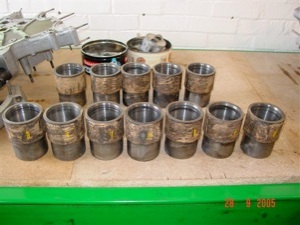
  Peter has stripped the engine completely apart & after examination was convinced that my problem resulted from slight movement of the cast iron cylinder liners. This made it impossible to tighten the heads down sufficiently to compress the head gaskets. The tolerance for the protrusion of the liners above the block is 0.07mm to 0.11mm., any greater & a seal cannot be achieved. |
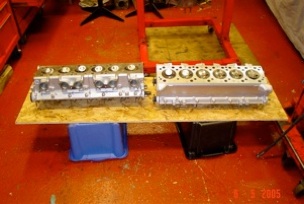
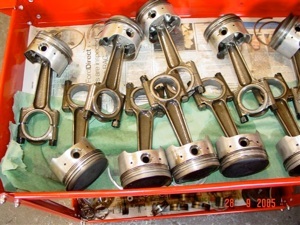
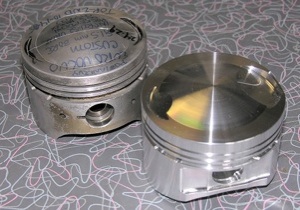
   Both block surfaces would be refaced & all 24 cylinder head studs had to be removed. Extracting these from an aluminium V-12 block 35 years was the remit of a skilled engineer to.The block faces were machined true & a new set of custom 0.5 mm oversize pistons came from J.E Pistons in California They were extremely helpful & made me 12 balanced pistons a further 50 thousandth inch valve cut out to accomodate any machining. |
    |
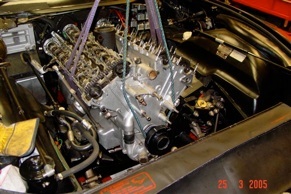
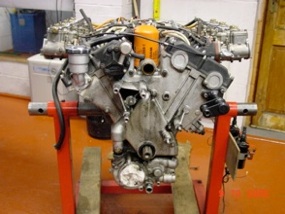
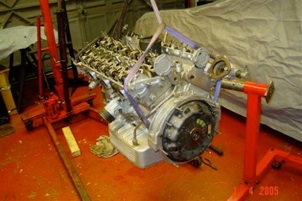
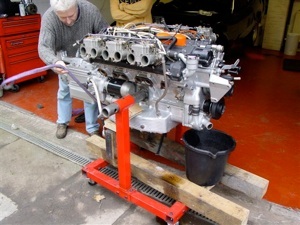
  Peter has done a first class job & the engine is back in the car. It started first time & runs perfectly & has now done almost 1200 miles since the final rebuild.The heads needed retorquing after this running in period & the valve clearances & timing have been checked & reset. I am pleased that the engine is runs beautifully & I am very relieved despite the major additional time & unexpected extra cost. |
 |
 |
 |
|
My car has now been on the road for more than 5 years & the engine runs fine.Since my own mishaps I have heard about three other instances where engine repairs undertaken by so called experts have been unsuccessful & one engine which is being rebuilt for the third time.Although I am really sad for the owners, these problems make me feel a little better about my own failures!! Although I made every effort to do my remedial work correctly I still ran into serious problems./p> Cutting corners on any work on these cars is folly but make sure your expert is indeed familiar with this particular engine. My friend Mike Meehan once told me: It is not strange that there may not be enough time or money to do the job properly first time around but there is always enough of both if the work needs to be done again? |
||